The lab this week consisted of taking oblique imagery from a UAS platform that flew in a corkscrew fashion around an object and annotating the images to receive a better quality 3D model for the finished product. In the previous projects we have used nadir format meaning the picture was taken looking straight down at the ground. An advantage of oblique imagery is the display is more representative of what the human eye sees at the surface. The three different objects that were captured in this project was a front-end loader, a shed, and a truck. The first experiment will include using 3D modeling without image annotation and comparing it to 3D modeling with image annotation. The image annotation in this project for 3D modeling is supposed to eliminate unwanted background content so that the 3D model is not distorted by those surrounding objects in the background.
Study Area
The study area included a front-end loader at the Litchfield mine site. The background consisted of pretty much all sand. The shed and the truck were both done at the South Middle School in Eau Claire. The shed has the sky, trees, and a running track in the background. The truck has the parking lot and some grass in all of its background. For all three of the locations, the images appeared to have been taken mid day because there are hardly any shadows other than the shed which may have been done in the evening.
Methods
The first part of the lab was to copy all of the oblique imagery into our own folder. Before starting on the project in Pix4D, as you go through and select the correct the images you want for the project, at the "Processing Options Template" you want to select the "3D Models" template as shown in figure 1.
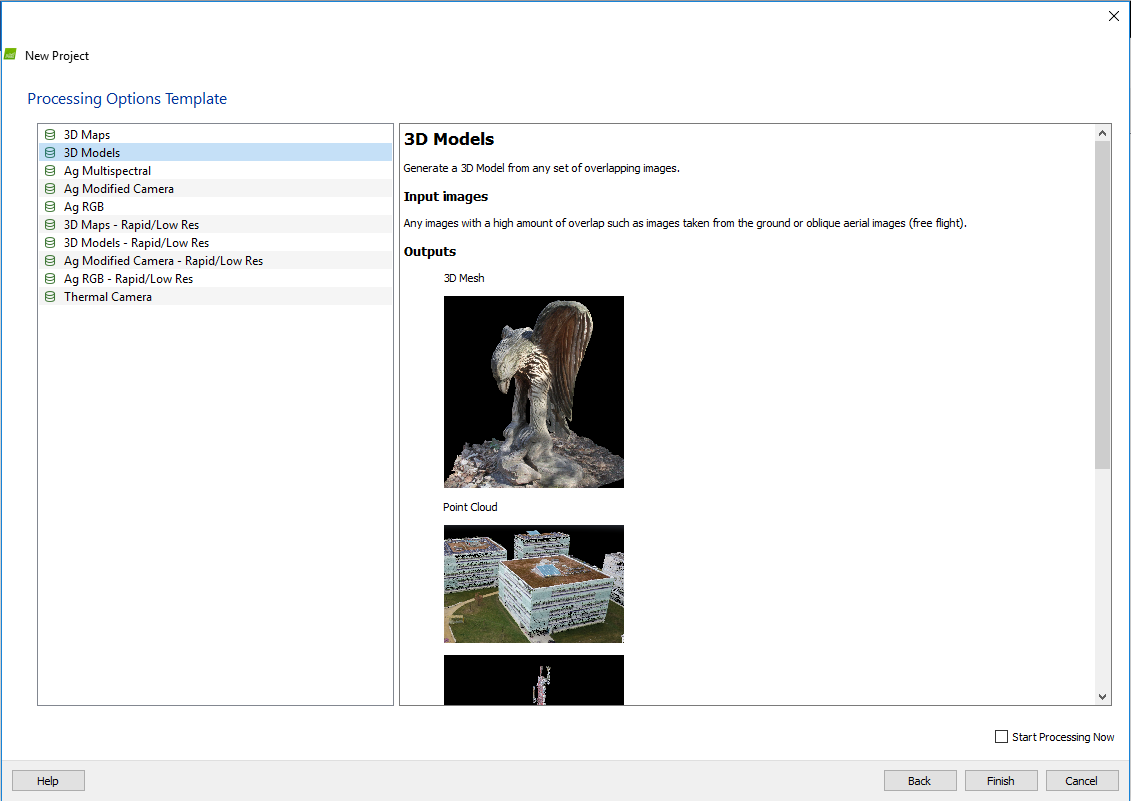
Figure 1. 3D Model template option in a new project
The next step is to start processing the images WITHOUT doing any annotation on the images. On this part I selected the front-end loader to process and compare without annotating images. After the processing was done, a video animation of the 3D model was the best way to represent the final product. In order to get a video animation, first you start by selecting the "New Video Animation" button in the Create tab. Next you setup your camera angles to portray the best possible angles of the 3D model. Each angle that is desired should be used by selecting "Record Trajectory Waypoint." after the waypoints are selected and finished, slect the parameters you want for the final output as shown in figure 2. So the video animation of the 3D model without annotating the front-end loader images is shown in the video below.

Figure 2. Trajectory waypoints for a video animation of the 3D model
Front-End Loader without annotation.
The next part is to annotate some of the oblique imagery with the "Image Annotation" tool. Annotation on the images is used to remove an object that appears in some of the images such as the sand in the front-end loader images, the trees within the shed images, or the grass and blacktop in the truck images. First off, select the image you want to annotate by going into Cameras > Calibrated Cameras > and select an image. Over on the right hand side, the image will appear and a tool that looks like a pencil is the "Image Annotation" tool (figure 3). For annotating, the Mask setting was used to highlight the background in all of the images that were annotated (figure 3). Once that is selected the tedious work highlighting of the background can begin. After about 8 images were annotated on the front-end loader, select the processing steps 2 and 3 to recreate the 3D model with annotated images. The final product can be seen in the video below.

Figure 3. The window that is displayed while annotating the selected image from the left hand side
Front-End Loader with annotation.
The next two projects with the shed and the truck in the parking lot consisted of the same exact workflow. Each projected had about 6 to 8 images annotated at different angles to get the best quality out of processing the 3D model for the final product.
Results
For the results of comparing the front-end loader with and without annotating some of the images was pretty minute. Some of the areas that may have been affected for the better were areas with gaps or holes to see the background such as the hydraulic hoses in the front, or near the muffler in the back. Otherwise the 3D model did not have much differences. Also on the front-end loader, the bucket was distorted and looked like it had something in it when the images show different.
The middle school shed honestly turned out pretty bad as far as getting rid of background objects and distortions. The peak of the roof has a white to light green and blue bubble like figure across the top. I'm assuming this may have to do with all of the objects in the background such as the trees and sky that make it difficult to produce the 3D model. Also the one wall on the shed was distorted and appeared to go through the roof which obviously is impossible. The fly through animation can be seen in the video Middle School Shed Annotated
The truck 3D model turned out probably the best as far as quality goes. the parts that got distorted were areas underneath the truck and the windows of the truck. This may have turned out the best because the only background that needed to be annotated was the ground which is completely flat all around the truck. The fly through animation of the truck can be seen in the video Truck Annotated.
Discussions
The oblique imagery in the project is very helpful in processing a 3D model of an object. However, when it came to annotating the images so that any background noise can be ignored was a very tedious task. When looking at the front-end loader images, the sand with tracks in it made it difficult for the sand to be masked as a whole. The worst one to annotate though was the truck in my opinion. the reason is because when annotating the blacktop parking lot, the pixels hardly ever match so you are even more tedious with masking the background. The easiest annotating was in the shed with the sky as the background. The similar pixel color of the blue sky made it so large chunks of the sky could be annotated with one click.
In order to get the best quality with annotating images to get a better 3D model would probably be to select images at different angles rather than multiple images from the same angle. This allows for the surroundings in the image to make the focused object to become less distorted. I feel like this may have been one of my problems when it came to the final 3D model of the middle school shed. I simply didn't pick enough different angles to annotate.
No comments:
Post a Comment