Introduction
This week's lab covers a mission planning software that enables us to utilize the proper steps taken prior to flying the UAS platform. The mission plan is created and allows for the platform to conduct a safe flight in which you define the parameters or mission settings for your specific flight plan. Multiple steps need to be taken not only with your platform and equipment that you are using but also the surroundings that you are going to be flying in. This includes knowing your area of interest, weather, terrain, and any other possible implications to the scene that may alter your flight planning.
Methods
Before you even leave the office there are some key planning essentials that may come back to haunt you if your not aware of the situation you are running into. This includes knowing the area that is being study such as, is the cell signal good, are there lots of people or traffic. Also knowing the vegetation and terrain can make a difference on how your flight plan will go like natural obstacles and land features. Checking the weather is another good observation to take note before leaving the office. Lastly, make sure you have all the right equipment prepared and the batteries are fully charged to get the maximum flight time needed.
When you first get into the field, check again to make sure all of your equipment is with and operational. As far as weather, check for wind, both speed and direction, check the temperature, and check the dew point. Also get an idea of the vegetation around you, this may decide where you want to land the UAS for soft and smooth landing conditions. Another point to add is assessing if there is any EMI issues such as power lines, underground cables, or power stations in the area. Next, get the elevation of the launch site and establish the units in which the team is working in to maintain consistency. Once everything in the surroundings is assessed and seems good to fly, confirm the cellular network is good and bring in the data of your field observations into the pre-flight check and flight log.
Software Demonstration
In this demonstration Bramor's C3P Software is used to easily setup mission parameters out in the field and on the go. Taking a look at the map there are a few symbols that should be known for take-off and landing reasons. There is 4 primary symbols; H - Home, T - Takeoff, R - Rally, L - Landing. The mission settings have 5 parameters that can be set during the pre-flight checklist (figure 1). After the mission settings are set, the Draw tool on the right hand side is used to determine the specified flight route and the 3D map view allows the flight route to be displayed in the flight area with the surrounding terrain in 3D.
In this software 4 different experimental flight missions were proposed. The first mission consisted of drawing customized waypoints around the Bramor Test Field while experimenting with different side-lap, overlaps, speeds, and absolute vs. relative flying altitudes. These waypoints represent the flight path the UAS will take until the last waypoint is established and it goes into the rally point and landing position (figures 2 and 3). The second flight mission plan is a corridor mission that follows along a linear feature such as a road in the area (figure 4). This corridor flight covers a perfect flight plan that uses the overlap and sidelap parameters in the mission settings so that the area is covered most efficiently. The third flight mission plan took into account some of the terrain in the surrounding Bramor Test Field areas (figures 5 and 6). The larger percentage of overlap in the flight plan there is, the more waypoints the mission planner will establish which makes the flight much longer. A problem that arise is the difference between "absolute" and "relative" altitude. Figure 6 displays a planned mission that makes the UAS fly right into the side of the hill (absolute altitude) and a planned mission that follows topography (relative altitude). Obviously in this case relative altitude is chosen so the UAS follows topography and does not crash into the hillside. The last mission was customized mission plan which was located in the backyard of a childhood home of mine (figures 7 and 8). This route flies on both sides of the a river that is excellent for fishing. Unfortunately when I first created the flight plan I didn't realize there were so many tree's right next to the river.

Figure 1. The Mission Setting parameters for pre-flight.

Figure 2. Waypoint flight plan with custom waypoints, home, takeoff, rally, and landing

Figure 3. 3D view of the custom waypoint flight plan in ArcGIS Earth

Figure 4. 3D view of the mission corridor flight plan along the nearest road with the takeoff and landing points represented very well near the left hand side of the image
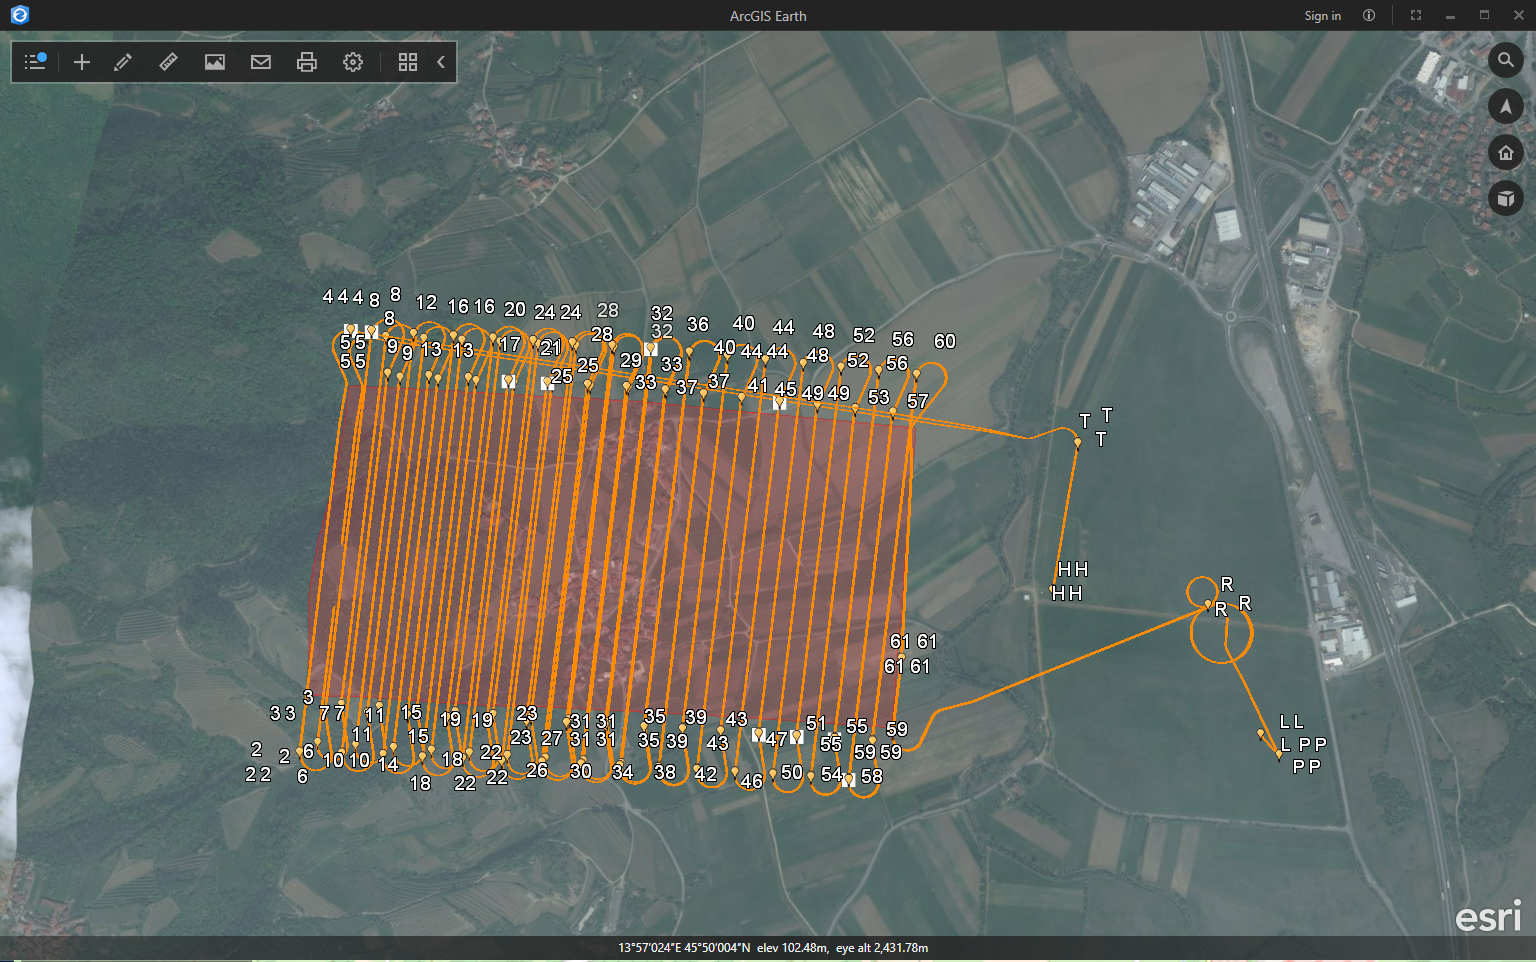
Figure 5. Plan view of a flight plan with some elevation increase on terrain towards the left side of the image.

Figure 6. 3D view of the terrain flight plan displaying an "absolute" altitude mission (goes into the hill) and a "relative" altitude" mission (follows topography).

Figure 7. Plan view of a customized flight plan of the river near a childhood home.

Figure 8. 3D view of the customized flight plan created near a childhood home.
Mission Planning Essentials Review
The importance of going through numerous steps before the UAS is in the air can be arguably just as, if not more important than the actual flight. Without the pre-flight checklist and mission planning essentials the data cannot be collected nearly as easy or as efficiently. The great part about this program is that the mission settings and parameters make it very user friendly and understandable. One of the neatest parts I thought is with different terrain you can determine whether you have an "absolute" altitude or a "relative" altitude. Another great integration is the ability to bring up your flight plan into ArcGIS 3D. Also having certain icons flash at you lets you know what you are missing before you can take flight which I believe is pretty important. An issue that I thought was difficult to deal with is the duration of the flight path simulation. I didn't seem to find any glitches or spots that were really standing out or lacking in. Overall this program was pretty great to use and seems like an awesome mission planning software.
No comments:
Post a Comment